Have you ever needed to record your voice or make a video recording of yourself? Have you ever needed to convert an audio or video file from one format to another? A company named 123apps LLC offers free and easy to use online tools. If you’re concerned about privacy, please review their privacy policy. I used the audio recorder recently to record some new messages for my voicemail system. My voicemail system required .mp3 files. QuickTime Player can make audio recordings, but it produces .m4a files. I could convert the .m4a file to .mp3 format using the online audio converter, but it was quicker to use the online voice recorder since it produces .mp3 files. Read More from “Free, Online Audio Recorder And Video Converter”
Assign Custom Names To Flags In Apple Mail
Do you use the Flag button in Apple Mail to tag some of your messages with a small red flag icon? This is a quick way to mark some messages so they’ll get your attention when you review your Inbox in the Mail application. Did you know that Mail offers 7 colored flags? Did you know that you can assign custom names to each flag?
Here are instructions for renaming the flags. It’s easy but not obvious how to do this since you have to first assign each color of flag to at least one email message.
- Open the Mail application
- Click on an email message
- Click the Message menu, select Flag, and then click on one of the 7 flag colors to assign this color to the selected message.
- Repeat steps 2 and 3 for each of the remaining flag colors until you have assigned all 7 colors to one or more email message.
- On the left-hand side of Apple Mail click on tiny arrow that appears to the left of the word Flagged. This will reveal a list of all of the flags.
- Control-click on the current name of one of your flags and select Rename Mailbox.
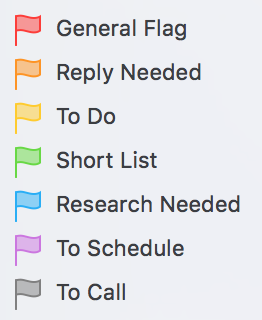
- Type in a new name for this flag. In the image below you can see that I’ve changed the default flag names to General Flag, Reply Needed, To Do, etc
How To Delete Old iPhone Or iPad Backups From Your Mac
Is your Mac’s internal storage nearly full? If so, you may have seen an error message indicating that your startup disk is nearly full. I typically use OmniDiskSweeper to free up storage space on a Mac. One of the easiest techniques I use to free up some storage space is to remove backups of iPhones or iPads that haven’t been used in months. Use these instructions to remove iPhone of iPad backups that you no longer need which are taking up precious storage space on your Mac.
- Open iTunes by clicking on its icon on the Dock, if present, or open it from your Applications folder.
- Click on the iTunes menu and select Preferences
- Click the Device button
- Review the list of backups listed. If you want to delete one, click on it
- Click the Delete Backup button
- You will be asked if you really want to do this. If you do, click the Delete button
- Click on iTunes and select Quit iTunes
How To Delete Old iPhone Or iPad Backups From iCloud
Do you want to delete a backup of your iPhone or iPad from iCloud? There are two reasons you might want to do this.
- Sometimes, if one is unable to successfully backup an iPhone or iPad to iCloud, it’s because the current backup is somehow gumming up the system. By removing the existing backup then one is able to start fresh and successfully backup his or her device.
- If one has stopped using an older iPhone or iPad it’s possible that the last backup of this device remains in one’s iCloud account. If this backup is more than a year old then it’s highly unlikely that one would ever want to recover data from this backup. Thus one might be wasting storage space in one’s iCloud account.
Read More from “How To Delete Old iPhone Or iPad Backups From iCloud”
Should I Purchase Microsoft Office Outright Or Get An Office 365 Subscription?
Are you trying to decide if you should buy Office for Mac as part of a Microsoft 365 subscription or as a stand-alone product? [Note: Microsoft 365 used to be called Office 365, but Microsoft re-branded in in early 2020.] While cost is one important consideration it is not the only one. I’d like to point out a few other considerations that I think you should keep in mind as you make your decision. It is important to know that regardless of whether you buy Office as a stand-alone product or as part of Microsoft 365, you get the ability to download and install Word, Excel, PowerPoint, etc on your Mac. Microsoft offers a web-based version of these applications.The online versions are only available if you have an Microsoft 365 subscription. The online versions are cleverly named Word Online, Excel Online, etc. Frankly, I don’t believe I’ve ever used them so I can’t comment on how similar or dissimilar they are from the full desktop versions. Microsoft 365 subscribers get access to new versions of Office when they are released, which is typically about every 3 or 4 years. For example, Microsoft made the following Mac versions of Office: Office 2011, Office 2016 and they released Office 2019 in September 2018. Read More from “Should I Purchase Microsoft Office Outright Or Get An Office 365 Subscription?”
Beware Of Sextortion Scam Emails
Have you received an email which starts off by listing one of your passwords and then goes on to indicate that a video recording of you watching an adult content video which will be sent to your friends unless you pay a few thousand dollars in bitcoin? Please don’t believe everything you read. Emails like this are scams. The first report I received of this type of scam email was in July 2018. Soon thereafter this article about sextortion scam emails appeared on Sophos’ website. Sophos is a British security company. The one truthful part of the email is that the spammers do possess one of your passwords. If you still use that password, please change it anywhere you use it. That’s all you need to do. Everything else in the email is bogus. Nobody installed spyware on your Mac. Nobody has video recordings of you.Here are some additional actions you could take:
- If you’d like to be safe, please scan your Mac using Malwarebytes.
- If you’d like to report this attempted extortion then please report it to the FBI using their IC3 (Internet Crime Complaint Center) web site, perhaps in the Internet Extortion section.
- If you’re like to read more about the history of this sort of scam read this article at The Parallax.
Easily Record Audio Or Video On Your Mac Using QuickTime Player
Have you ever wanted to make a video recording of either yourself or your Mac’s screen? Have you ever needed to make a quick audio recording of your voice using your Mac? You can do this easily using Apple’s QuickTime Player. QuickTime Player is a free application and it comes bundled with the Mac operating system (macOS). I believe these features exist in all versions of QuickTime Player version 10, which was introduced alongside OS X Snow Leopard in 2009. I think that having the word Player in QuickTime’s name throws people off and they do not realize that it can be used to both create (or record) audio and video as well as play a variety of audio and video files. Read More from “Easily Record Audio Or Video On Your Mac Using QuickTime Player”
How To Import Mbox Files Into Outlook 2016
Do you use Outlook 2016 on your Mac? Have you ever needed to import email messages stored in an mbox file? Mbox files are a common way to store email messages on computers using the UNIX operating system. Since the Mac operating system is a derivative of UNIX, Apple’s own Mail application stores its email message in an mbox format. I recently needed to import some email messages, stored in mbox files, into Outlook 2016 and was surprised to learn that Outlook 2016 can’t import mbox files. While there are some third-party applications that will let you import mbox files into Outlook I didn’t want to spend $40-$50 to accomplish this. Instead, I used Outlook 2011 for Mac, as an intermediary. Read More from “How To Import Mbox Files Into Outlook 2016”
What’s The Meaning Of That Icon On My Apple Watch?
Do you own an Apple Watch? Do you wonder what about the meaning of the dots and icons that appear at the top center of the watch’s screen? Those dots and icons are called Status Indicators. Apple has wonderful, concise guide to these Apple Watch status indicators
How To Encrypt A USB Flash Drive
Do you want to encrypt an external hard drive or USB flash drive connected to your Mac? Encrypting the drive will protect the data on that drive. Each time that drive is connected to another Mac you’ll need to enter a password before the drive is available and before you can view or edit the files on the drive. Apple makes it easy to encrypt an external drive.The feature is built into macOS, the Mac operating system. Right-click (or control-click) on the drive’s icon on your Mac’s Desktop (or in the left-hand sidebar of a Finder window) which causes a menu to appear. Read More from “How To Encrypt A USB Flash Drive”
Things To Check If A Recipient Does Not Receive Your Email
Did a friend or colleague tell you that he or she did not receive an email that you sent? If so, here are the initial steps that you should take to identify the reason for this. The problem could be on your end or on his or her end so let’s start by trying to figure this out. Read More from “Things To Check If A Recipient Does Not Receive Your Email”
Get Directions To Your Favorite Locations On Your iPhone
Do you frequently drive to a handful of destinations such as your home, office, gym, coffee shop, restaurant or storage unit? Did you know that you can mark these frequently visited locations as Favorites in the Maps app on your iPhone? Then you can easily get directions to these destinations. Even if you know your way to these destinations, it can be handy to ask Maps for directions since it’ll often offer 2 or 3 routes and point out the fastest based on current traffic conditions. Read More from “Get Directions To Your Favorite Locations On Your iPhone”
How To View Hidden Files On A Mac
Did you know that there are thousands of invisible files on your Mac? Have you ever needed to locate or delete one of these invisible files? Here are a couple of ways to be able to access the invisible files and folders on your Mac. A cautionary note, Apple makes these files invisible for a reason. They do not think the typical person needs to access these files and they are right. However, there are instances, such as when one is trying to manually uninstall an application or troubleshoot a problem that one needs to be able to access the invisible files on one’s Mac.Please be cautious when working on files that are typically invisible. If you do not know what a file’s purpose is, leave it alone. Some files are critical to the proper functioning of your Mac. Read More from “How To View Hidden Files On A Mac”
How To Batch Rename Files On A Mac
Have you ever wanted to rename a group of files? For example, maybe you wanted to select a group of images and give them names like Grand Canyon 1, Grand Canyon 2, etc. Here are a three ways to accomplish this task. Read More from “How To Batch Rename Files On A Mac”
What’s Required To Make And Receive Phone Calls From An AppleWatch
Have you heard that the AppleWatch can be used to make and receive phone calls? It’s true, starting with the AppleWatch Series 3 which Apple introduced in September 2017. That said, there are a few details that one should be aware of. Read More from “What’s Required To Make And Receive Phone Calls From An AppleWatch”
Review All Devices Linked To Your AppleID
Have you replaced your iPhone, iPad, Mac or AppleTV with a newer one? If so, did you remove that older device from your iCloud account? It is prudent to review the devices linked to your AppleID account and to remove devices that you no longer use. You can have a maximum of 10 devices connected to your account at one time including a maximum of 5 computers. Read More from “Review All Devices Linked To Your AppleID”
One Fix For Excel 2016 Spellcheck Not Working
Do you have Office 2016 installed on your Mac? By any chance does the spellcheck feature work in Word but not Excel? Here’s a possible fix. A client recently reported having this problem. Spellcheck worked properly for her in Word 2016. When she opened Excel 2016, she’d click on the Review tab and then click the Spelling button and nothing would happen. Read More from “One Fix For Excel 2016 Spellcheck Not Working”
Granting LogMeIn Access To Your Mac
[Update Nov 2023: Sound Support no longer uses LogMeIn for remote access to client Macs.]
Are you one of my clients? Do you have LogMeIn installed so I can remotely access your Mac to provide you with remote support? If so, a recent update to LogMeIn requires you to grant it greater access to your Mac. A window notifying you of this will appear on your Mac’s screen. Please go ahead and give LogMeIn the access that it is requesting. Read More from “Granting LogMeIn Access To Your Mac”
How To Remove An Email Account From An iPhone Or iPad
Do you use Apple’s Mail application on your iPhone or iPad? Do you want to remove one of your email accounts? This process isn’t difficult, but there are a couple of non-obvious steps. Here are instructions for removing an email account from Mail on your iPhone or iPad. Read More from “How To Remove An Email Account From An iPhone Or iPad”
How To Remove An Email Account From Apple Mail
Do you use Apple’s Mail application on your Mac? Do you want to remove one of your email accounts from Apple Mail? This process isn’t difficult, but there are a couple of non-obvious steps. Here are instructions for removing an email account from Apple Mail. Read More from “How To Remove An Email Account From Apple Mail”