Do you have duplicate photos in your iPhoto or Photos Library? Do you dread the manual process of trying to locate and delete these duplicate photos? If so, use PhotoSweeper. PhotoSweeper will locate all duplicate photos and makes it easy for you to review them and select which ones you want to delete. In addition to identifying exact duplicate files, it also lets you find very similar photos. Using this feature you can find photos taken a few seconds apart or photos taken using Burst Mode on your iPhone. Here’s an overview of how to use PhotoSweeper.
I am going to assume you are using Apple’s Photos application, but PhotoSweeper works with iPhoto 9.x, Aperture 3.x, Adobe Lightroom 3.x and newer as well as Capture One 8.x and newer.
You can get a detailed PhotoSweeper user manual.
- Before you begin, make sure you have a full backup of your Photos Library.
- Quit the Photos app. It can’t be open or in use while you’re using PhotoSweeper
- Buy a copy of PhotoSweeper, currently $10, from either the AppStore or the PhotoSweeper web site. Get the app downloaded and installed on your Mac.
- Open PhotoSweeper on your Mac and click the Media Browser button, then click the plus sign button, select your Photos Library.
- From the Media Browser window drag your Photos Library into the PhotoSweeper window.
- Click the Compare button. Comparisons can take quite a long time depends upon how many photos you have
- For this first pass, select the Duplicate Files option. This will locate exact duplicates.
- When PhotoSweeper finishes doing its comparison, it’ll likely ask you if you want it to Auto Mark photos. Click the Auto Mark button, to permit this.

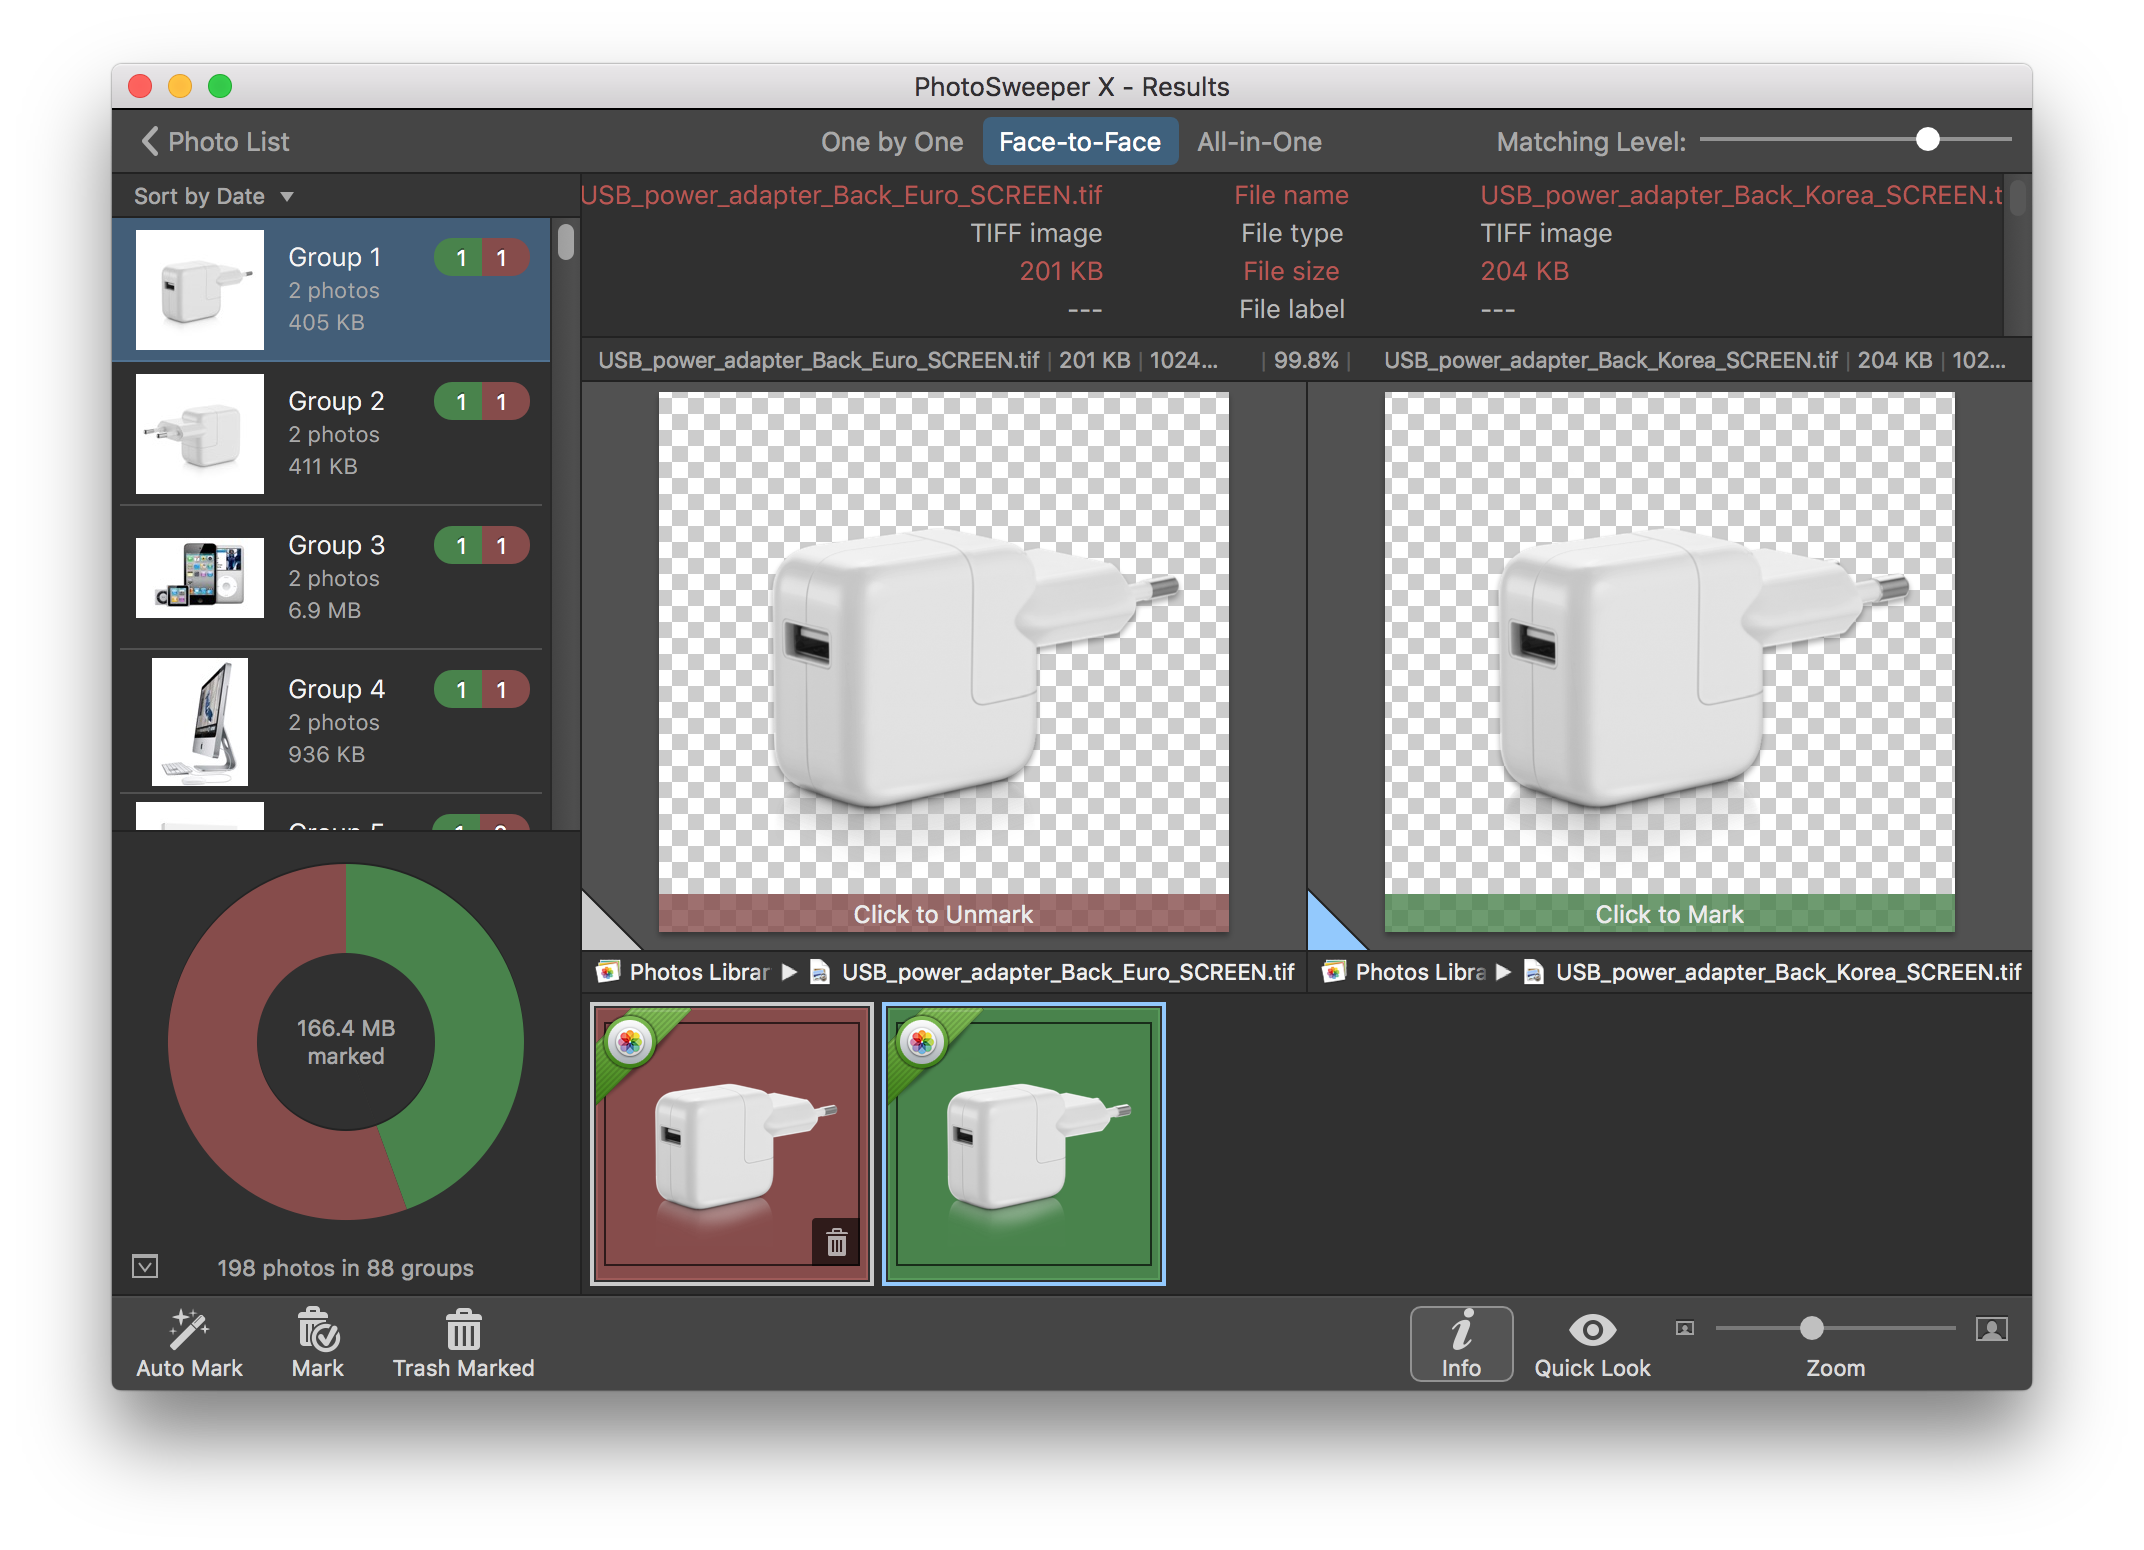
- You should see a window like the one shown above.
- One-by-one, click on each group of duplicate photos listed on the left-hand side to review the photos.
- In each group you’ll see which photo(s) are marked in red. This indicates that they’ll be deleted. To change a photos marking simply click on it, as indicated.
- Once you’ve reviewed all groups of photos then click the Trash Marked button in the lower left corner.
- You’ll likely be prompted to open Photos and select the All Photos album. Do this. PhotoSweeper doesn’t immediately delete the photos. Instead, it moves them into an Album named Trash (PhotoSweeper). You can control-click on this Album and select Delete Photos to truly get rid of them.
- Next, you’ll want to return to steps 6-13 to perform a second comparison of photos in your Photos Library. This time, however, in Step 7 select Similar Photos.
The Similar Photos option then lets you adjust the Time Gap and Matching Level. I suggest you set the Time Gap to Less Than 3 Seconds and then leave the Matching Level close to Exact. Then let PhotoSweeper perform its comparison. The result should be photos that were taken seconds apart and are nearly identical. This would include photos taken using Burst Mode as well as other photos that you took rapidly as you were trying to capture some action.
PhotoSweeper is a one-trick pony, but it provides a user-friendly way to scan large photo libraries, identify and remove duplicate photos.