Do you have a cluttered Inbox? Do you value emails from a few people more than all the rest? If so, you should make those few people VIPs. By designating a person as a VIP then emails from that person will appear in the VIP Mailbox which appears, separate from and below your Inbox. Here are some instructions on how to use this VIP feature.
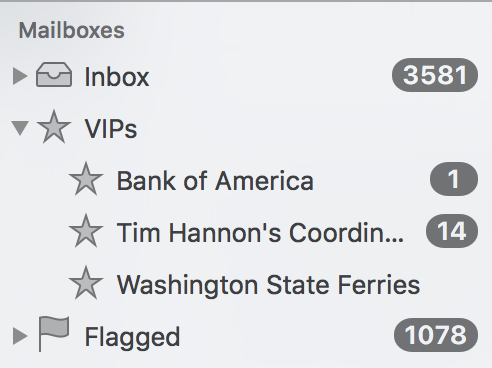
Apple Mail received a new VIP feature in 2012 when Apple released Mac OS X Mountain Lion. Emails from VIPs remain in the Inbox, but also appear in the VIP mailbox which will appear as soon as you designate your first VIP. Each VIP gets his or her own VIP mailbox as shown in this image.
It is easy to designate a person as a VIP by doing the following:
- Click on a message in your Apple Mail Inbox.
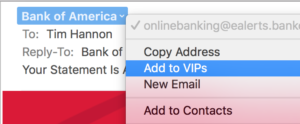
- Locate the sender’s name and hover your cursor on top of their name.
- You should see a blue box appear around the name, click the tiny arrow on the right end of the blue box and select Add to VIPs from the list, as shown in the image below.

It’s that easy! You’ll now see a VIP mailbox appear on the left-hand side of Apple Mail. If you want to remove a person’s VIP status, repeat steps 1-3 but select “Remove from VIPs”.
If you use Apple Mail on your iPhone or iPad then these VIP mailboxes will appear on those devices as well as on your Mac. I strongly encourage you to check out and use this handy feature.