Do you take digital photos and would you like to quickly create a file with thumbnail size versions of photos from a trip or family event? This file is called a contact sheet. Professional photographers commonly want to create contact sheets of all photos from a wedding or other photo shoot. Here are a couple of ways to create a contact sheet if you use a Mac.
If you use Photoshop, it has a built-in contact sheet creator feature. This is the easiest way, but it requires Photoshop.
- Open Photoshop and click on the File menu
- From the File menu select Automate and then select Contact Sheet
- You’ll be prompted to select a folder containing photos. Do this and then let Photoshop do the rest. It’ll create a PDF of all images with the file names listed below the image.
If you don’t have Photoshop then give this method a try. I have tried this on 4 Macs and it worked on two of them. I’m not sure why it failed to work properly on the others. The following instructions will create a PDF of all images that you have in the folder that you select. You could then annotate the PDF using Preview to add captions below each image.
- Click on the Finder icon on your Dock to open a Finder window
- Click on the Go menu and select Applications to see the items in your Applications folder.
- Double-click on Automator to open it. [Note: Automator is part of the Mac operating system. It’s used for creating workflows to automate tasks.]
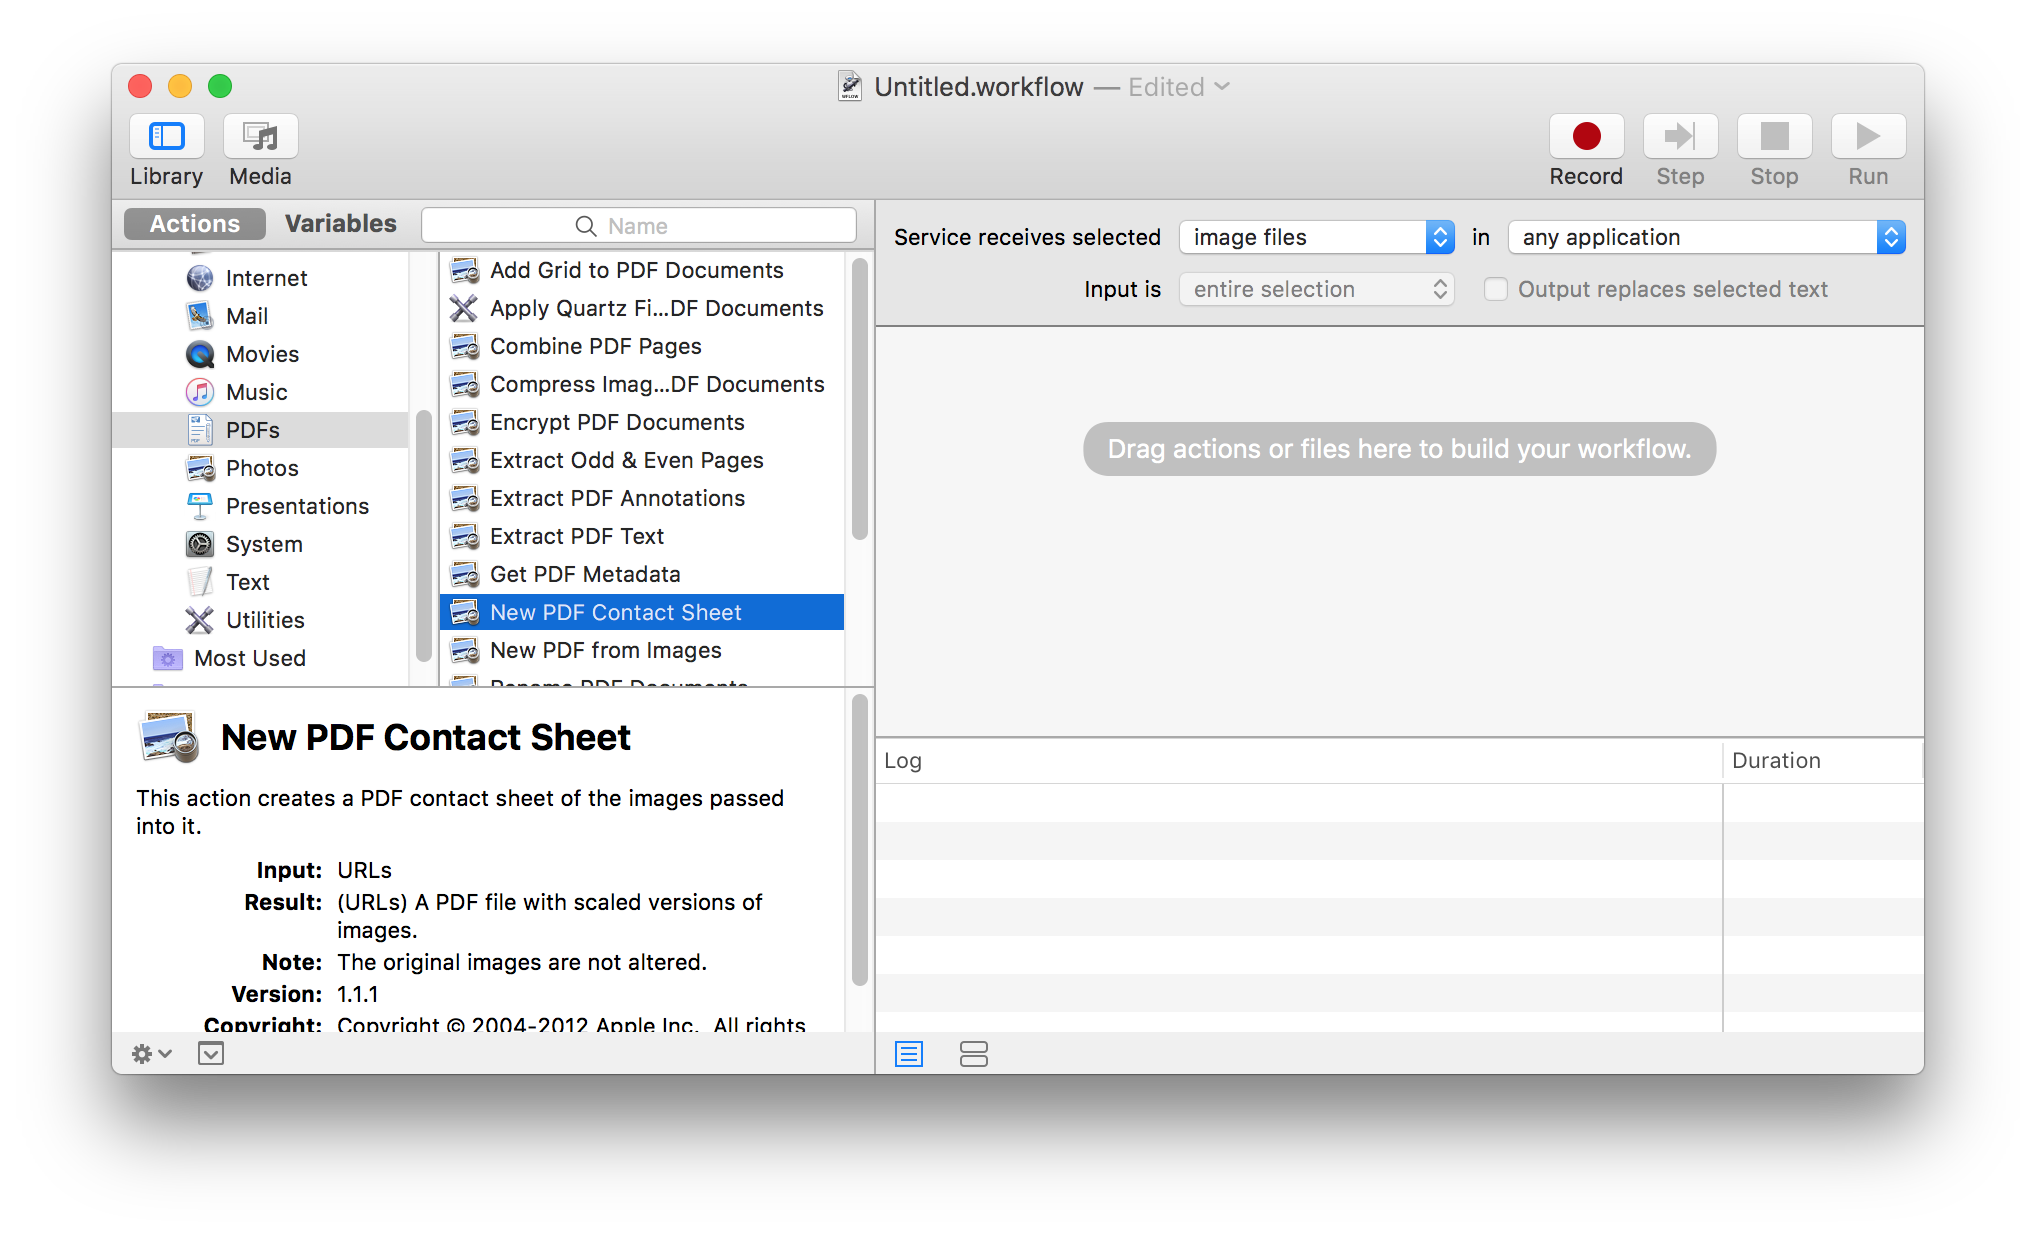
- Click the New Document button
- Click on Service as the type of document.
- Use the image below as a guide when following these instructions.

- Near the upper right corner, select “image files” to the right of “Service receives selected “
- In the left-most column, click on PDFs.
- In the column to the right, click on New PDF Contact Sheet and drag it to the right.
- Click on the Options button and insert a checkmark next to “Show this action when the workflow runs.”
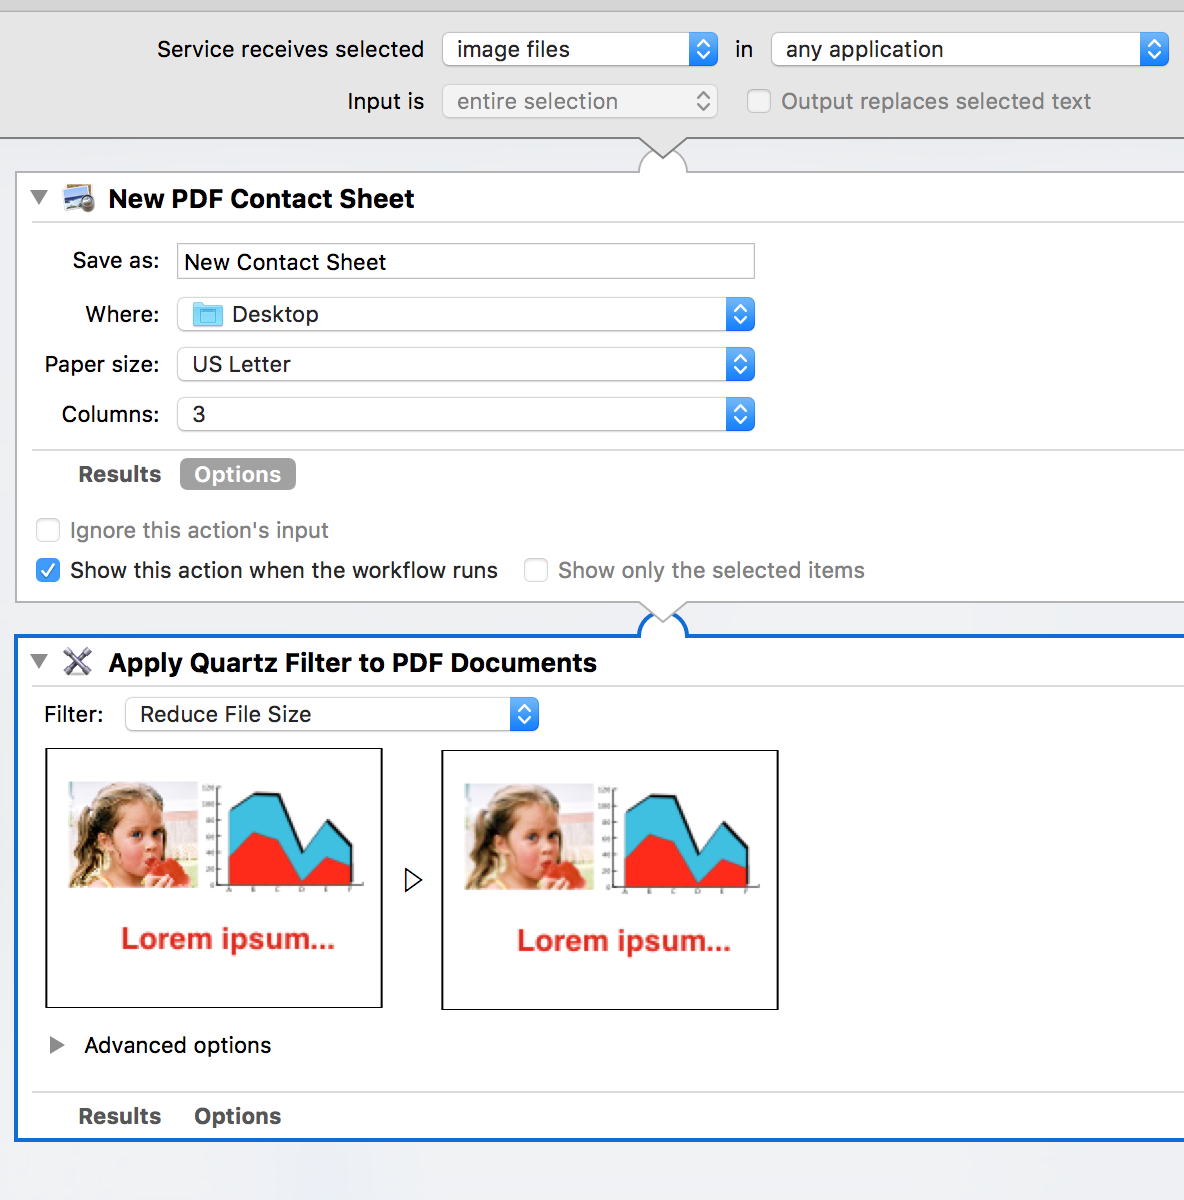
- In the same column, click on “Apply Quartz Filter to PDF Documents” and drag it to the right.
- You’ll be asked if want to add a “Copy Finder Items” action. You do not want to do this so click the “Don’t Add” button.
- From the list of available filters, select “Reduce File Size”
- Your Automator workflow should now look like this:

- Click on the File menu and select Save.
- Give your Service a name, such as “Create PDF Contact Sheet on the Desktop”
- Click on the File menu and select Quit Automator.
Now, let’s test our Automator workflow.
- In the Finder click on a folder containing a bunch of digital images.
- Select one or more of the images in this folder. (If you don’t know how to easily select multiple files, read my Tech Tip on selecting multiple files.)
- Click on the Finder menu, select Services and pick your workflow.
- You should be prompted to name your contact sheet and pick a destination for the resulting PDF contact sheet–the Desktop is the default.
- If you change the number of columns from 3 to either 4, 5 or 6 then your thumbnail images will be smaller.
- Click the Continue button and wait for the PDF contact sheet to be produced and saved.
- Locate your contact sheet and open it to check it out.
- [Note, if you’d like to add captions and you use Apple’s Preview application to open your PDF file then review this Tech Tip about annotating PDFs.]
Anyone who happens to see this:
1) The process has changed some for Automator 2021
2) My experience (Quick Action or Workflow) I was only able to get it to work once. Why? I have no idea. If you get it to work – great. If not…
3) There’s an image application (FREE) XNView runs on Mac Monterey (as of this writing). Pick your images, click “Create” in the menu, Select “Contact Sheet” follow the prompts, click “Create” – done. So far has worked every time. Dead simple.
fjunk,
Thanks for pointing out that this feature no longer works in Automator and mentioning the XNView alternative. Very helpful.