Trying to make out a tiny serial number or some fine print you can barely read can be frustrating. Years ago, Apple added a magnifier mode to its accessibility options and turned the feature into a standalone app in iOS 14. You can find the Magnifier app in the Utilities folder in your App Library (swipe left on the Home Screen until you get there), open it by voice (“Hey Siri, open Magnifier.”), and add it to Control Center (Settings > Control Center). Its special camera viewfinder is zoomed automatically, but you can change the zoom level with the slider and tap the flashlight icon to add illumination—more controls can be added by tapping the gear icon. Tap the round shutter button to freeze the image (tap it again to resume). Double-tap the viewfinder to hide all the controls, and double-tap again to bring them back. Read More from “Remember the Magnifier App When You Need to Read Tiny Text”
Choosing the Best Mac for a College-Bound Student in 2024
Is your child heading off to college soon? They’ve undoubtedly been using a computer throughout high school, though now is a good time to look at getting them a new one, especially if theirs is old or unreliable, is shared with other family members, or was a school loaner. If you haven’t been keeping up with Apple’s Mac lineup, you might be unsure which model is the best choice. Read More from “Choosing the Best Mac for a College-Bound Student in 2024”
Prep Your Tech for Travel
Long ago, to get ready for a trip, we’d mostly make sure we had our plane tickets, books and magazines to read, and a snack. Prepping for travel in today’s tech-heavy world comes with a new set of tasks, most of which shouldn’t be left to the last minute. Read More from “Prep Your Tech for Travel”
Two Techniques for Improving Google Chrome Security
Although most Mac users rely on Apple’s Safari for Web browsing, plenty of people prefer Google Chrome for its cross-platform compatibility, massive collection of extensions, and tight integration with the Google ecosystem. Chrome is by far the most popular browser in the world, with about 65% of the market, compared to Safari’s 18%. Still others opt for alternative browsers based on the same open-source Chromium engine, such as Arc, Brave, Microsoft Edge, Opera, and Vivaldi.
Unfortunately, Chrome’s dominance makes it a target for attackers in two ways. Read More from “Two Techniques for Improving Google Chrome Security”
It’s Usually OK to Share Full-Size Images in Email and Messages
In the early days of the Internet, when most people connected via slow modems, saving bandwidth was a big deal. You could watch images load on Web pages, and you’d have to wait to download a large email attachment before the rest of your email would appear. For most people, in most situations, bandwidth isn’t nearly as big of a deal anymore. Read More from “It’s Usually OK to Share Full-Size Images in Email and Messages”
Working Late on Your Mac? Turn on Night Shift to Help Your Sleep
Research suggests that exposure to blue light fools your body into thinking it’s daytime, making it harder to fall asleep if you work late on a Mac with a bright white (which has a lot of blue light) screen. To help, a macOS feature called Night Shift subtly changes the colors of the screen as the sun sets to reduce the amount of blue light hitting your eyes. Read More from “Working Late on Your Mac? Turn on Night Shift to Help Your Sleep”
How to Make Productive Use of Generative AI Chatbots and Artbots
Artificial intelligence dominates the tech news these days, but it’s hard to separate the hype from the reality. Every large company seems to have some major AI initiative in the works. Even Apple, which tends to stick to its own path, has started to tout features previously described as relying on “machine learning” as being “AI.” If you can get past the hype, AI has plenty of good uses now. Read More from “How to Make Productive Use of Generative AI Chatbots and Artbots”
Quickly Catalog Books or Other Named Items on Shelves
If you have trouble finding particular items across multiple shelves of books, labeled boxes, or anything else that’s clearly identified with a text name, take carefully composed photos that capture all the titles without glare. Later, you can search for any text in those photos to find them Read More from “Quickly Catalog Books or Other Named Items on Shelves”
Find Some Ham Amidst Your Email Spam
Spam filters work pretty well—99% of the messages in your spam mailbox are probably spam. But it’s frustrating to miss an important message that was caught by an overeager spam filter. Here’s an easy way to find many good messages, also known as “ham,” amidst all the spam. Read More from “Find Some Ham Amidst Your Email Spam”
Share 2FA Setup for Team Access to a Single Account
When your team or family shares access to a single account (such as for banking or social media, which seldom offer multi-user access), using two-factor authentication via SMS is awkward—whose phone receives the 2FA codes? Read More from “Share 2FA Setup for Team Access to a Single Account”
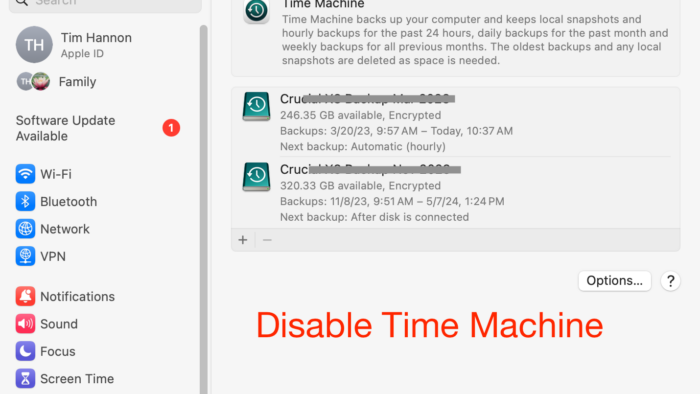
How to Disable Time Machine
Have you recently migrated to a new Mac while continuing to use your older Mac occasionally? If so, you might continue to backup your new Mac using Time Machine, but you might not need to backup your older Mac any longer. Here are instructions on how to disable Time Machine on a Mac running macOS 12 Monterey or newer. If your Mac is running an older version of the Mac operating system (macOS) see the section below.
Read More from “How to Disable Time Machine”Tame the Tangle! Quick Cable Management Tips
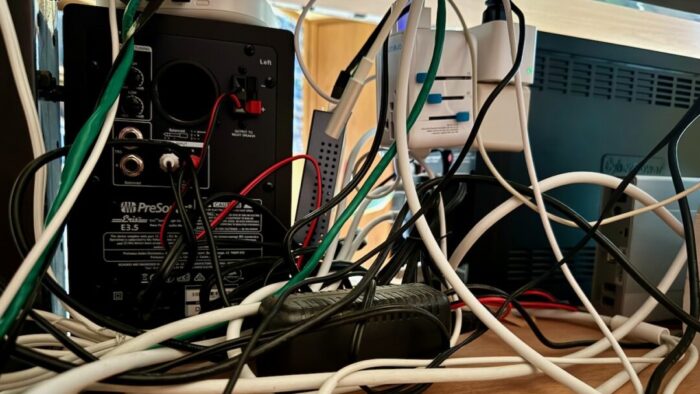
Take a moment and look behind your Mac. Do you see a tangle of cables? The main downside of a mess of cables is that it’s a cluster of chaos that attracts dust bunnies. However, it’s possible for power cables—especially when tightly bundled or looped—to emit electromagnetic interference that can disrupt or degrade the signal carried by nearby data or network cables. They can also heat up, which is generally best avoided. Read More from “Tame the Tangle! Quick Cable Management Tips”
At WWDC, Apple Unveils Apple Intelligence and Previews New OS Features
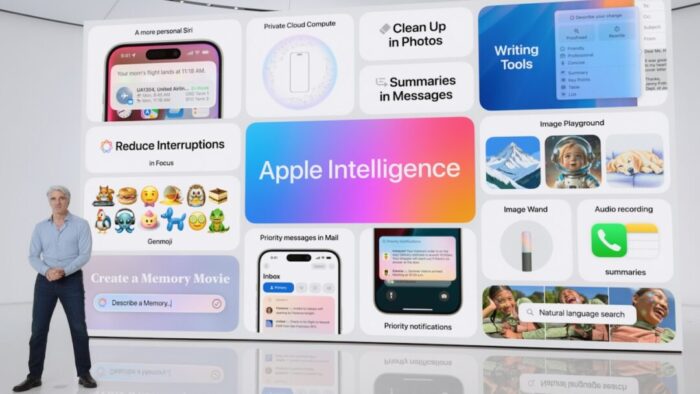
Apple’s Worldwide Developer Conference keynote was a lightning-fast (even in the full 1:44-long video—or try the 3-minute recap) look at what Apple is bringing to the software side of the Apple experience in the next year. Although some past keynotes have introduced hardware like new Macs and the Vision Pro, this year’s keynote stuck to new operating system features before previewing a suite of AI features collected under the umbrella term “Apple Intelligence.” Read More from “At WWDC, Apple Unveils Apple Intelligence and Previews New OS Features”
Sorry, Apple Isn’t Going to Update the 27-inch iMac with Apple Silicon
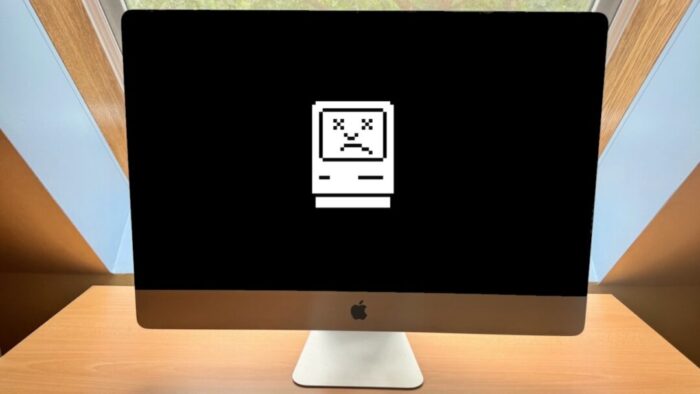
Are you a 27-inch iMac owner wondering when Apple will release a new model with speedy Apple silicon? We hate to be the bearer of bad news, but the answer seems to be an unequivocal “Never.” Read More from “Sorry, Apple Isn’t Going to Update the 27-inch iMac with Apple Silicon”
Monitor Recommendations
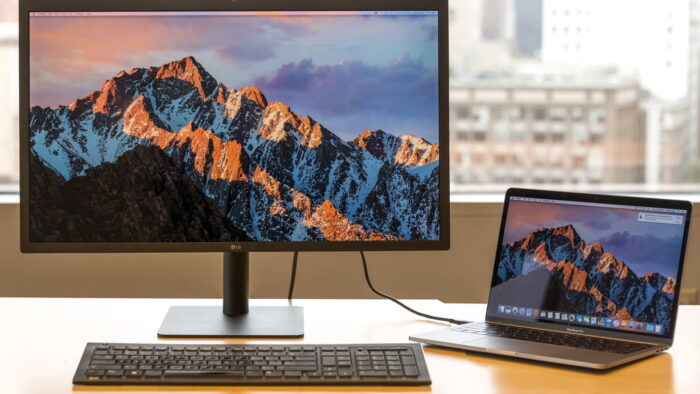
Would you like some guidance on selecting a new monitor? Clients often ask me to recommend a good monitor or tell them which monitor they should buy. These requests are actually surprisingly difficult for two reasons. First, there are numerous monitor manufacturers and each company makes a range of models so it’s tough to track the entire market. Second, people’s individual needs vary. Consequently, rather than recommend one or two particular monitors, I often start by outlining the range of monitor features to help people select an appropriate monitor for their needs.
Read More from “Monitor Recommendations”Select Non-Contiguous Text in Pages, Keynote, and Numbers 14
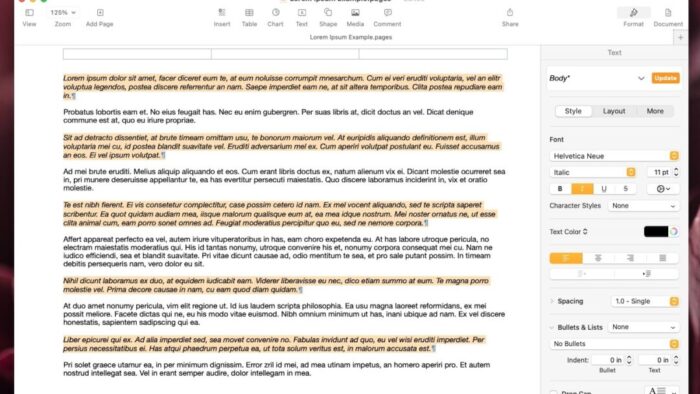
The latest versions of the Mac and iPad apps in Apple’s iWork suite—Pages 14, Keynote 14, and Numbers 14—have gained a helpful feature: non-contiguous text selection. By holding down the Command key, you can select chunks of text that aren’t next to each other. For example, imagine you want to make the first part of each item in a bullet list bold. Instead of bolding each one separately, hold down Command as you work to select all of them and then apply bold to the entire selection with a single command. Non-contiguous selection is particularly helpful when applying formatting, but you can also copy non-contiguously selected text or work with it in nearly any way you would interact with a contiguous text selection. (Note that while holding down Command, you can double-click to select words or triple-click to select paragraphs, just as you can normally without holding down Command.)

(Featured image by Adam Engst)
Social Media: A new feature in Pages, Keynote, and Numbers lets you select bits of text that aren’t next to each other so that you can, for example, format them or copy them all at once.
Display an Album of Photos on Your iPhone or iPad Lock Screen
A popular feature of iOS 16 was the Photo Shuffle option for customizing the iPhone Lock Screen. It used machine learning to select photos in four categories—People, Pets, Nature, and Cities—and rotated through them when you tapped, on lock, hourly, or daily. If you didn’t like the automatic selection, you could pick photos manually, but it was clumsy. In iOS 17 (and iPadOS 17, which also added customizable Lock Screens), you can now point the Lock Screen’s Photo Shuffle wallpaper at an album. Touch and hold the Lock Screen, tap Customize, tap the blue ⨁ button to create a new wallpaper, select Photo Shuffle, select Album, choose the desired album from the pop-up menu, set a frequency, tap Use Album, and tap the Add button at the top. Then tap Set as Wallpaper Pair or Customize Home Screen to choose a different image for the Home Screen wallpaper. Read More from “Display an Album of Photos on Your iPhone or iPad Lock Screen”
Where Can You Control Automatic Smart Quotes and Dashes in macOS?
Most people like smart quotes and dashes, at least most of the time. Your Mac is probably set up to turn the single (‘) and double (“) hash marks and double hyphens (–) that you type into the apostrophes (’) and single smart quotes (‘’), double smart quotes (“”), and em dashes (—) used in professional publications. However, in some situations, like programming, smart quotes and dashes are problematic. Read More from “Where Can You Control Automatic Smart Quotes and Dashes in macOS?”
How to Display the Battery Percentage in Your Mac’s Menu Bar
By default, the battery icon in your Mac laptop’s menu bar shows how full your battery is. Clicking it reveals the exact percentage, but you can also set macOS to display the battery percentage next to the icon. The setting isn’t where you might expect in System Settings > Battery. Instead, you’ll find it in System Settings > Control Center, where you need to turn on both “Show in Menu Bar” and “Show Percentage.” Read More from “How to Display the Battery Percentage in Your Mac’s Menu Bar”
Apple’s iCloud Keychain Password Management Is All Many People Need
Apple’s iCloud Keychain Password Management Is All Many People Need
We constantly recommend using a password manager like 1Password, BitWarden, or Dashlane. But many people resist committing to yet another app or paying for yet another service. Isn’t Apple’s built-in iCloud Keychain password management good enough? Read More from “Apple’s iCloud Keychain Password Management Is All Many People Need”


