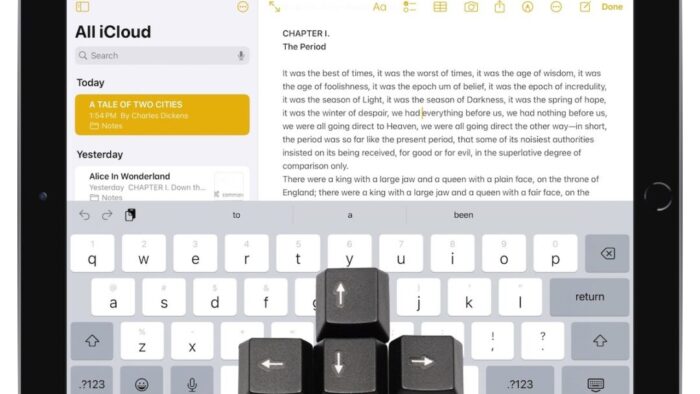
A friend recently expressed astonishment when she saw us using trackpad mode while editing text on an iPhone. (It works on the iPad, too!) So, even if you already know these tips, do your friends a favor and show them: Read More from “Five Quick Tips to Ease iPhone and iPad Text Editing and Amaze Your Friends”
Set macOS to Require a Password after Screen Saver Start or Display Sleep
Although paying attention to online security is of primary importance, don’t forget local security. You don’t want to go out for lunch and let someone wandering by your office poke through your email, messages, photos, and private files. To ensure this doesn’t happen, set your Mac to start the screen saver or sleep the display after a few minutes (on a laptop, just close the lid), and then set “Require password after screen saver begins or display is turned off” to a short duration. We recommend 1 or 5 minutes, though you can adjust to balance inconvenience against security. To eliminate the fuss almost entirely, use Touch ID or an Apple Watch to unlock your Mac without having to type your password. Read More from “Set macOS to Require a Password after Screen Saver Start or Display Sleep”
No More Ransom Website Offers Ransomware Decryption Tools
We’ve written in the past about how Apple-only companies can protect themselves from ransomware (strong security, isolated backups, monitoring software), but realistically, it’s primarily a threat to computers running Windows and Linux. If you, or anyone you know, is targeted by ransomware, look to the No More Ransom website, developed by Europol’s European Cybercrime Centre and the Dutch police, for advice and tools. Read More from “No More Ransom Website Offers Ransomware Decryption Tools”
What You Need to Know Before Switching to a New iPhone
Are you planning to upgrade to a new iPhone 16? It’s exciting, we know, but it’s best to proceed deliberately when setting up your new iPhone to avoid causing yourself headaches. Follow these instructions when you’re ready to transfer your data—and, for many people, much of your digital life—to the new iPhone. Read More from “What You Need to Know Before Switching to a New iPhone”
When Should You Should Upgrade to macOS 15 Sequoia, iOS 18, iPadOS 18, watchOS 11, tvOS 18, and visionOS 2?
The calendar has flipped over to September, so Apple will soon release major upgrades for all its operating systems. iOS 18 and watchOS 11 will undoubtedly ship alongside new iPhone and Apple Watch models mid-month. iPadOS 18 is likely to accompany iOS 18, as are tvOS 18 and visionOS 2. Although Apple has sometimes delayed the release of macOS until later in the year, we anticipate that Apple will release macOS 15 Sequoia earlier this year, probably with its siblings. That’s because the company has already said it will release the initial Apple Intelligence features in iOS 18.1, iPadOS 18.1, and macOS 15.1; those will probably debut in October or November.
Apple previewed these releases at its Worldwide Developers Conference in June, and many people have been testing the public betas since. Once Apple judges each of its operating systems to be ready for public consumption, the question arises—when should you upgrade? Read More from “When Should You Should Upgrade to macOS 15 Sequoia, iOS 18, iPadOS 18, watchOS 11, tvOS 18, and visionOS 2?”
Apple Announces iPhone 16 Lineup, Apple Watch Series 10, and AirPods 4
It’s September, which brings the annual Apple crops: new iPhones, Apple Watches, and AirPods. At its recent Glowtime event, Apple unveiled the new iPhone 16 lineup, Apple Watch Series 10, and AirPods 4, alongside smaller announcements about existing products. As always, the enhancements in the new products are evolutionary, making them attractive to anyone already looking to buy a new iPhone, Apple Watch, or pair of AirPods. Read More from “Apple Announces iPhone 16 Lineup, Apple Watch Series 10, and AirPods 4”
NPD Breach Reveals Data on Hundreds of Millions, Here’s How to Respond
A few months ago, news broke about the latest massive data breach, this time from a company called National Public Data, a company that collects vast amounts of personal data about individuals from public data sources, including addresses, employment history, criminal records, and Social Security numbers. NPD then sells access to that data to employers conducting background checks, landlords screening potential tenants, banks verifying loan information, and more. Read More from “NPD Breach Reveals Data on Hundreds of Millions, Here’s How to Respond”
How to Password Protect a Folder on Your Mac
Do you want to password protect a folder on your Mac? If it’s a folder you use regularly then you can use Disk Utility, a free application that comes bundled with your Mac. That’s the focus of this article. On the other hand, if you want to encrypt a file or folder for long-term storage then you might consider Encrypto made by MacPaw which I mention below.
If you’re going to use the Disk Utility method then I think it’s important to offer this clarification up front. Technically, you’re not exactly password protecting the folder. Instead, Disk Utility will copy your original folder into a special file, called a disk image. This disk image will be encrypted. In order to open this encrypted disk image you’ll need to type in a password. Thus your folder will be stored in a password-protected disk image, which achieves the original goal. Remember to delete your original folder on your Mac. Otherwise, you could get confused by having duplicates copies of files on your Mac.
Encrypto, which is free, lets you quickly encrypt a file or a folder on your Mac. However, once it’s encrypted then you need to save it. Then if or when you want to open that file then you need to decrypt it and save it again. Encrypting and decrypting occurs pretty quickly but having to do this each time makes this cumbersome for files or folders that you regularly access and, in my opinion, only useful for stuff you rarely access. Also, remember to store a copy of the password you use to encrypt each item in your password manager. If you forget your encryption password then you would lose access to your encrypted item.
Read More from “How to Password Protect a Folder on Your Mac”Be Careful When Scanning Unknown QR Codes
QR codes, those square, blocky codes you scan with your iPhone’s camera to load a Web page, have become ubiquitous. So much so that we seldom pause before scanning any QR code we see. But if you think about it, that’s the same as clicking random links in emails or texts, which is a terrible idea from a security perspective. Read More from “Be Careful When Scanning Unknown QR Codes”
Missed an Alert? Check Notification Center
iOS, iPadOS, and macOS all let you specify whether any given app should show no notifications, temporary banners, or persistent alerts: look in Settings > Notifications and System Settings > Notifications. Temporary banners appear briefly and then automatically disappear, which is appropriate for notifications requiring no acknowledgment. But what if you see a temporary banner only as it’s disappearing and can’t read it in time? Read More from “Missed an Alert? Check Notification Center”
Protect Domains That Don’t Send Email from Email Spoofing
We recently wrote an article for those who manage their own Internet domain names about using SPF, DKIM, and DMARC to prevent your domains from being used in phishing attacks and enhance the deliverability of legitimate email. But what about other domains you own but don’t use for email? Read More from “Protect Domains That Don’t Send Email from Email Spoofing”
Having Trouble with a Public Wi-Fi Network’s Captive Portal Login Page?
When you connect to a public Wi-Fi network at an airport, hotel, coffee shop, or school, you may need to interact with a captive portal login page to be granted access to the network. It might require you to enter login credentials, ask for your name, or make you agree to terms of service. But what if that login page doesn’t appear, or something kicks you off the network and you can’t reconnect? Read More from “Having Trouble with a Public Wi-Fi Network’s Captive Portal Login Page?”
Understanding the Key Differences Between Personal and Managed Apple IDs
In the Apple world, the account that controls access to all your Apple-related online services is the Apple ID. Buying apps from the App Store, putting photos in iCloud Photos, and sharing data between iCloud-enabled apps—all these actions rely on your Apple ID. If you’re a regular Apple user, you have an Apple ID associated with your email address. Read More from “Understanding the Key Differences Between Personal and Managed Apple IDs”
When Should You “Ignore Ownership” on an External Drive?
Under the hood, macOS relies on Unix, which is a multi-user operating system. That’s why a Mac can host multiple users who, as long as they don’t know each other’s passwords, cannot see each other’s files. To maintain each user’s privacy, macOS relies on permissions that specify who can do what with any given file or folder. For the most part, permissions work how they’re supposed to, letting you work with all your files and keep any other users on the Mac out of your stuff. Read More from “When Should You “Ignore Ownership” on an External Drive?”
Make the Most of the Mac’s Videoconferencing Capabilities
A side effect of the pandemic is that online videoconferencing improved drastically. Video calls happened before 2020, but videoconferencing wasn’t an everyday activity for most people. Now, with many people working remotely or in a hybrid model, it’s a fact of business life. To support videoconferencing tools, Apple has extended macOS’s basic webcam and microphone capabilities to allow Mac-powered video calls to go beyond the basics. Apple’s enhancements fall into four categories: camera modes and controls, mic modes, reactions, and Presenter Overlay. Read More from “Make the Most of the Mac’s Videoconferencing Capabilities”
Use High-Quality Cables for Optimal Performance and Safety
Apple’s prices for Thunderbolt, USB-C, and Lightning cables often seem unnecessarily high. $69 for a Thunderbolt 5 cable or $19 for a simple USB-C to Lightning cable? Unfortunately, when it comes to cables, you often get what you pay for. Happily, other reputable hardware manufacturers like Anker, Belkin, and OWC sell quality cables for less than Apple. When possible, get cables with braided covers, which tend to last longer because the braided design makes them less prone to kinks, less likely to tangle, and more resistant to abrasion. Read More from “Use High-Quality Cables for Optimal Performance and Safety”
How To Open 20 Year Old Word Documents
Do you have some 20 year old documents that you created in Microsoft Word? Are you aware that today’s version of Microsoft Word likely can’t open them? If you have older Word documents that are important to you, please consider converting them to an open format file type such as PDF/A, so you’ll be to open them more easily in the future. Every so often clients ask me for help opening old Word files. Here are a couple of methods that one can use, as of mid-2024, to open files created in older versions of word like Word 98, Word X and Word 2004. I wasn’t able to test if these applications can open Word 5 or Word 6 files.
Read More from “How To Open 20 Year Old Word Documents”Apple Explains Its Approach to Device Longevity
We Apple users tend to believe that our devices usually last longer—both physically and functionally—than Windows PCs and Android smartphones. For instance, Apple’s current operating systems work on nearly all Macs, iPhones, and iPads introduced in 2018 and later, albeit with some feature loss on the oldest devices. In a white paper entitled “Longevity, by Design,” Apple has now outlined how it works to increase product longevity through design and manufacturing, ongoing software support, and access to repair services. Read More from “Apple Explains Its Approach to Device Longevity”
Insert Emoji More Easily with Text Replacements
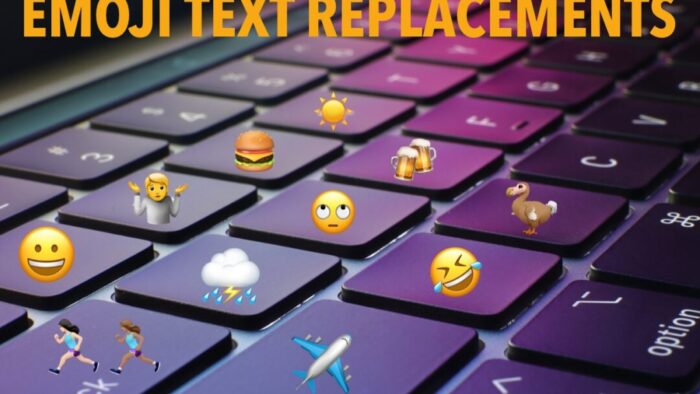
For many of us, emoji are fun, but we don’t want to choose Edit > Emoji & Symbols whenever we want to insert one. A faster, better technique is to set up text replacements for emoji you insert often. Read More from “Insert Emoji More Easily with Text Replacements”
How to Copy an App Icon on the Mac
Let’s say you’re writing documentation to help colleagues use Preview to edit images, sign PDFs, and convert graphics. (A worthy task for which they will thank you!) For this documentation, you want to include the Preview app’s icon so they know what to look for in the Applications folder and Dock. To copy a high-resolution version of any app icon that you can paste into a document or combine with other graphics, select the app in the Finder, choose File > Get Info, select the little icon in the upper-left corner of the Info window, and press Command-C. You can then use Command-V to paste it wherever you want or create a new file containing all sizes of the icon by switching to Preview and choosing File > New From Clipboard. Read More from “How to Copy an App Icon on the Mac”


![Left side of a Mac laptop on a wooden desk. Red hard drive is plugged into it. White text overlay on the hard drive reads [checkbox] Ignore ownership on this volume?](https://soundsupport.biz/wp-content/uploads/2024/08/Ignore-Ownership-external-drive-text-photo-1080x675-1-700x394.jpg)


