Do you use Time Machine to backup your Mac? Are you annoyed by messages from Time Machine indicating that it can’t backup to a hard drive that you no longer have? Here are instructions on how to remove a specific hard drive from Time Machine’s configuration.
If your Mac is using macOS 12 Monterey or older, use the instructions listed in Section 1
If your Mac is using macOS 13 Ventura or newer, jump to Section 2.
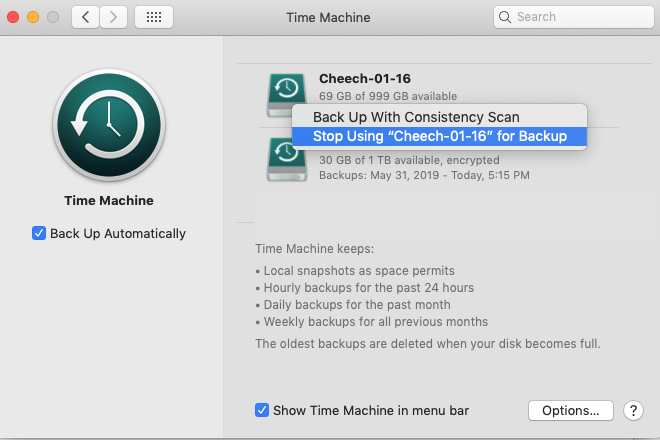
Section 1 – if your Mac is running macOS 12 Monterey or older
- Click on the Apple menu and select System Preferences
- Click on Time Machine
- Hold down the Control key on your keyboard as you simultaneously click on the icon for the older backup hard drive. Use the attached image as a guide.
- Select Stop using <your hard drive name> for Backup
- Click the red dot to close this window
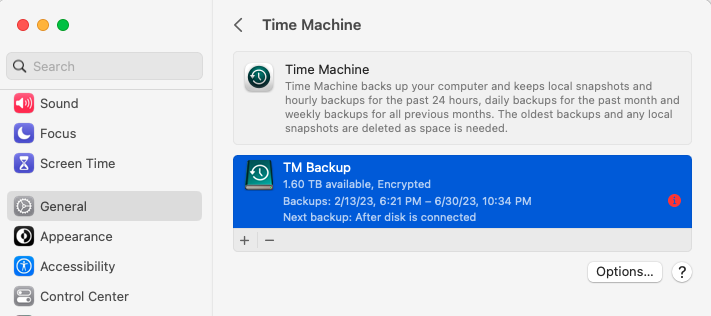
Section 2 – if your Mac is running macOS 13 Ventura or newer
- Click on the Apple menu and select System Settings
- Click on General
- Click on Time Machine
- Click on the hard drive currently being used for backup. Use the image below as a guide.
- Click the minus sign below the selected drive
- Click the Forget Destination button
- Click the red dot to close this window