Do you want to password protect a folder on your Mac? If it’s a folder you use regularly then you can use Disk Utility, a free application that comes bundled with your Mac. That’s the focus of this article. On the other hand, if you want to encrypt a file or folder for long-term storage then you might consider Encrypto made by MacPaw which I mention below.
If you’re going to use the Disk Utility method then I think it’s important to offer this clarification up front. Technically, you’re not exactly password protecting the folder. Instead, Disk Utility will copy your original folder into a special file, called a disk image. This disk image will be encrypted. In order to open this encrypted disk image you’ll need to type in a password. Thus your folder will be stored in a password-protected disk image, which achieves the original goal. Remember to delete your original folder on your Mac. Otherwise, you could get confused by having duplicates copies of files on your Mac.
Encrypto, which is free, lets you quickly encrypt a file or a folder on your Mac. However, once it’s encrypted then you need to save it. Then if or when you want to open that file then you need to decrypt it and save it again. Encrypting and decrypting occurs pretty quickly but having to do this each time makes this cumbersome for files or folders that you regularly access and, in my opinion, only useful for stuff you rarely access. Also, remember to store a copy of the password you use to encrypt each item in your password manager. If you forget your encryption password then you would lose access to your encrypted item.
Here’s how to create and use a password-protected (encrypted) folder using OS X El Capitan (circa 2015) and newer versions of the Mac operating system (macOS). If you’re looking for more generic instructions on how to create an encrypted disk image on a Mac, read my older article.
Let’s pretend that you have a folder named Client Project which you want to protect with a password.
- Go to your Applications folder and open the Utilities folder.
- Open the Disk Utility application.
- Click on the File menu and select New Image, then, from the sub-menu, select New Image from Folder.
- Navigate to your folder, select it, and click the Choose button. Use the image below as a guide.
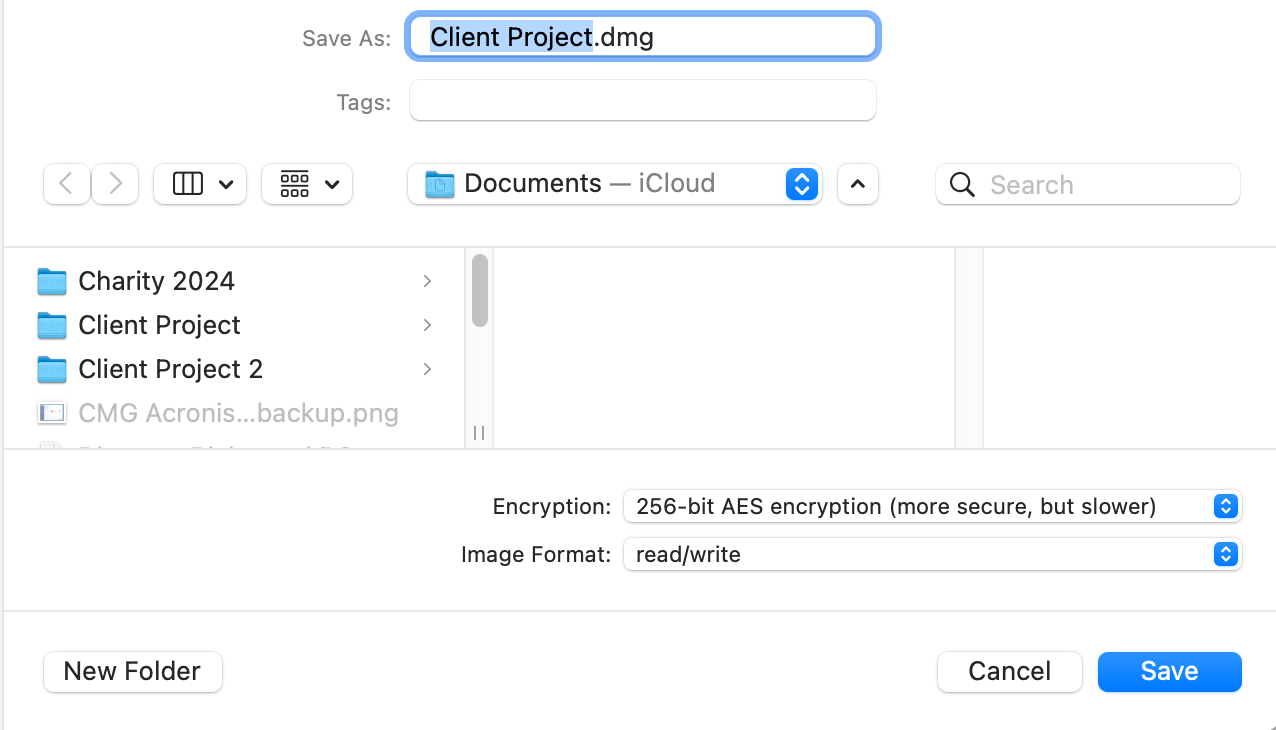
- In the Save As field type in a name for your disk image. Since my folder is named Client Project, I’ll name my disk image Client Project.dmg (Important: Do not remove or change the .dmg file extension.)
- Select a folder where you’d like to save your disk image. You can see that I’m about to save mine in the Documents folder.
- In the Encryption section set it to 256-bit AES encryption. When you choose this you’ll be prompted to twice enter the password you want to use to protect the folder. Do this and then click the Choose button. (Important: after entering the password make sure you make a record of this password. If you lose or forget your password you’ll lose access to the contents of the disk image.)
- Set the Image Format to read/write.
- Click the Save button.
- The disk image file will be created and you’ll be notified in Disk Utility. Click the Done button and quit Disk Utility.
Warning: If you forget the password to your encrypted disk image, your data will be irretrievably lost so please write down your password on a piece of paper. This is just a precautionary measure.
Now, let’s check out your disk image. Start by navigating to your newly created disk image and double-click it to open it. You’ll be prompted to type in your password.
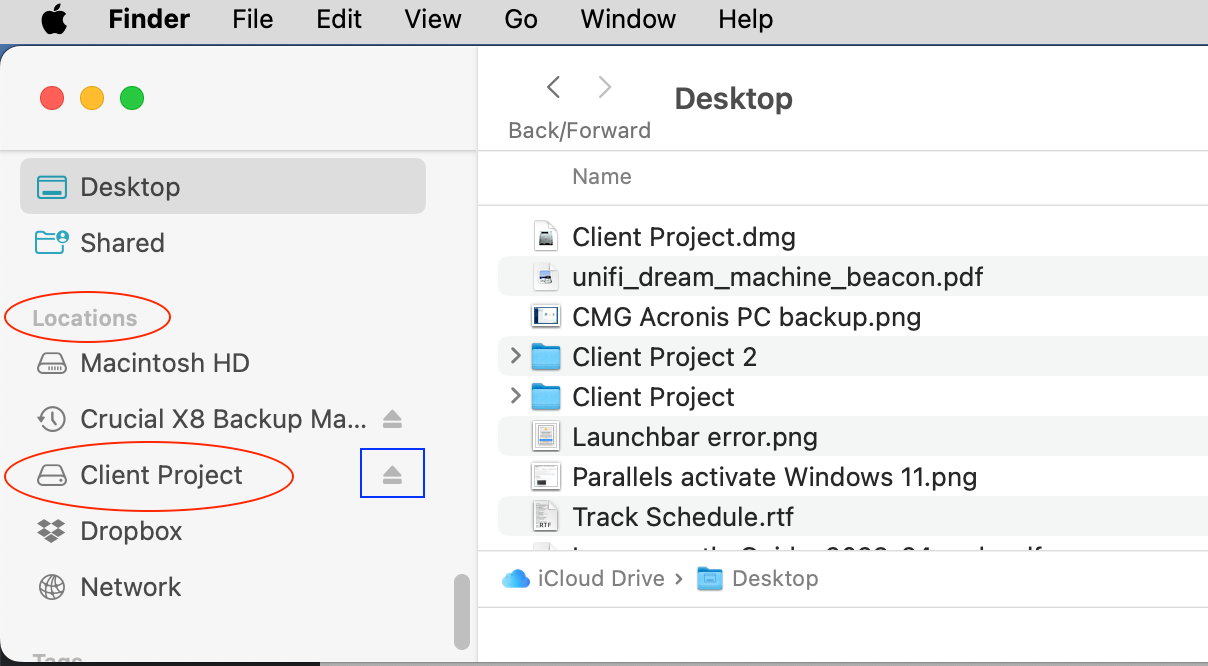
Use the image below as a guide. When your disk image is open you’ll see it listed in the Locations section in the Finder. I highlighted this area with red ovals in the image.
Click on Client Project in the Locations section to verify that your encrypted disk image contains all of the files that were in the original Client Project folder. Open and edit a file, if you’d like, just to test things thoroughly. Save the changes you make.
Let’s pretend you’re done using the Client Project disk image. You’ll need to eject this disk image by clicking the eject button. The eject button is marked with a blue rectangle in the image below. You can think of ejecting a disk image as similar to closing and locking your folder.
If you’re certain that your new disk image contains all of the expected files then you can delete your original Client Project folder. In the future, double click your new Client Project.dmg disk image file when you want to work on this project and the files it contains.