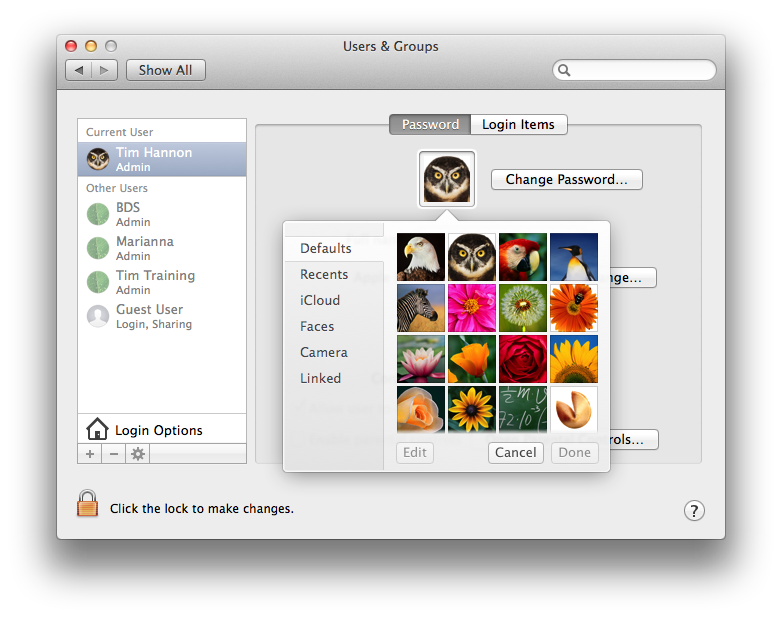
Below are instructions on how to change your OS X user account picture. When you took your new Mac out of the box and turned it on initially, you were lead through creating a user account and either had one of the built-in photos randomly assigned to your User Account or you were offered the choice of using the Mac’s built-in camera to take a photo of yourself. Not surprisingly, clients are often not happy with the photo linked to their account. Here are instructions on how to change the photo:
- Click on the Apple menu and select System Preferences. If you’re running macOS 14 or higher, see the section below this for instructions.
- From the View menu select User & Groups if your Mac is using OS X 10.7 or higher. If your Mac is using OS X 10.4 through 10.6 then select Accounts instead.
- Click on the photo that appears to the left of the words Change Password. You should see something similar to what is shown in the image below.

- Select one of the included pictures or select one of the other sources like Faces, iCloud or Camera and select a photo from the chosen source. Alternatively, you could drag an image from a web page directly onto the photo area. When you select a photo you can use the Zoom slider to zoom in on image you selected.
For macOS 14 and later
- Click on the Apple menu and select System Settings
- Select User & Groups from the left-hand column
- Click on the
 button to the right of your account
 - Click on the photo that appears to the left of your user name
- Select one of the included pictures or select one of the other sources like Faces, iCloud or Camera and select a photo from the chosen source. Alternatively, you could drag an image from a web page directly onto the photo area. When you select a photo you can use the Zoom slider to zoom in on image you selected.
